SafePal S1

Introduction
Hardware wallets reinvented the wheel by keeping private keys (needed for signing transactions) in an offline environment separate from internet connections, avoiding the numerous hacks or threats that arise from software wallets reliant on internet connectivity. This way, users' crypto assets are more secured and shielded from internet dangers brought on by software wallets.
One of such hardware wallets that has integrated with Kaia is SafePal S1 Hardware Wallet. SafePal S1 is a cryptocurrency hardware wallet that aims to provide a secure, simple, and enjoyable crypto management solution for the populace. SafePal is an hardware wallet to secure and manage cryptocurrencies and NFTs, such as Bitcoin, KAIA, Kaia Compatible Tokens(KCT), Ether and ERC20 tokens e.t.c.
In this guide, you will:
- Add, Receive and Send Klay, and any Kaia Compatible Tokens(KCT) with SafePal S1 Hardware Wallet
Prerequisites
Getting Started
After you must have successfully set up your wallet, next is to see the wallet in action. In this tutorial we will be adding, receiving and sending KAIA native coin, and any Kaia Compatible Tokens(KCT) using the SafePal S1 Hardware Wallet.
Adding KAIA native coin
To add the KAIA native coin to your hardware wallet, kindly follow the steps below:
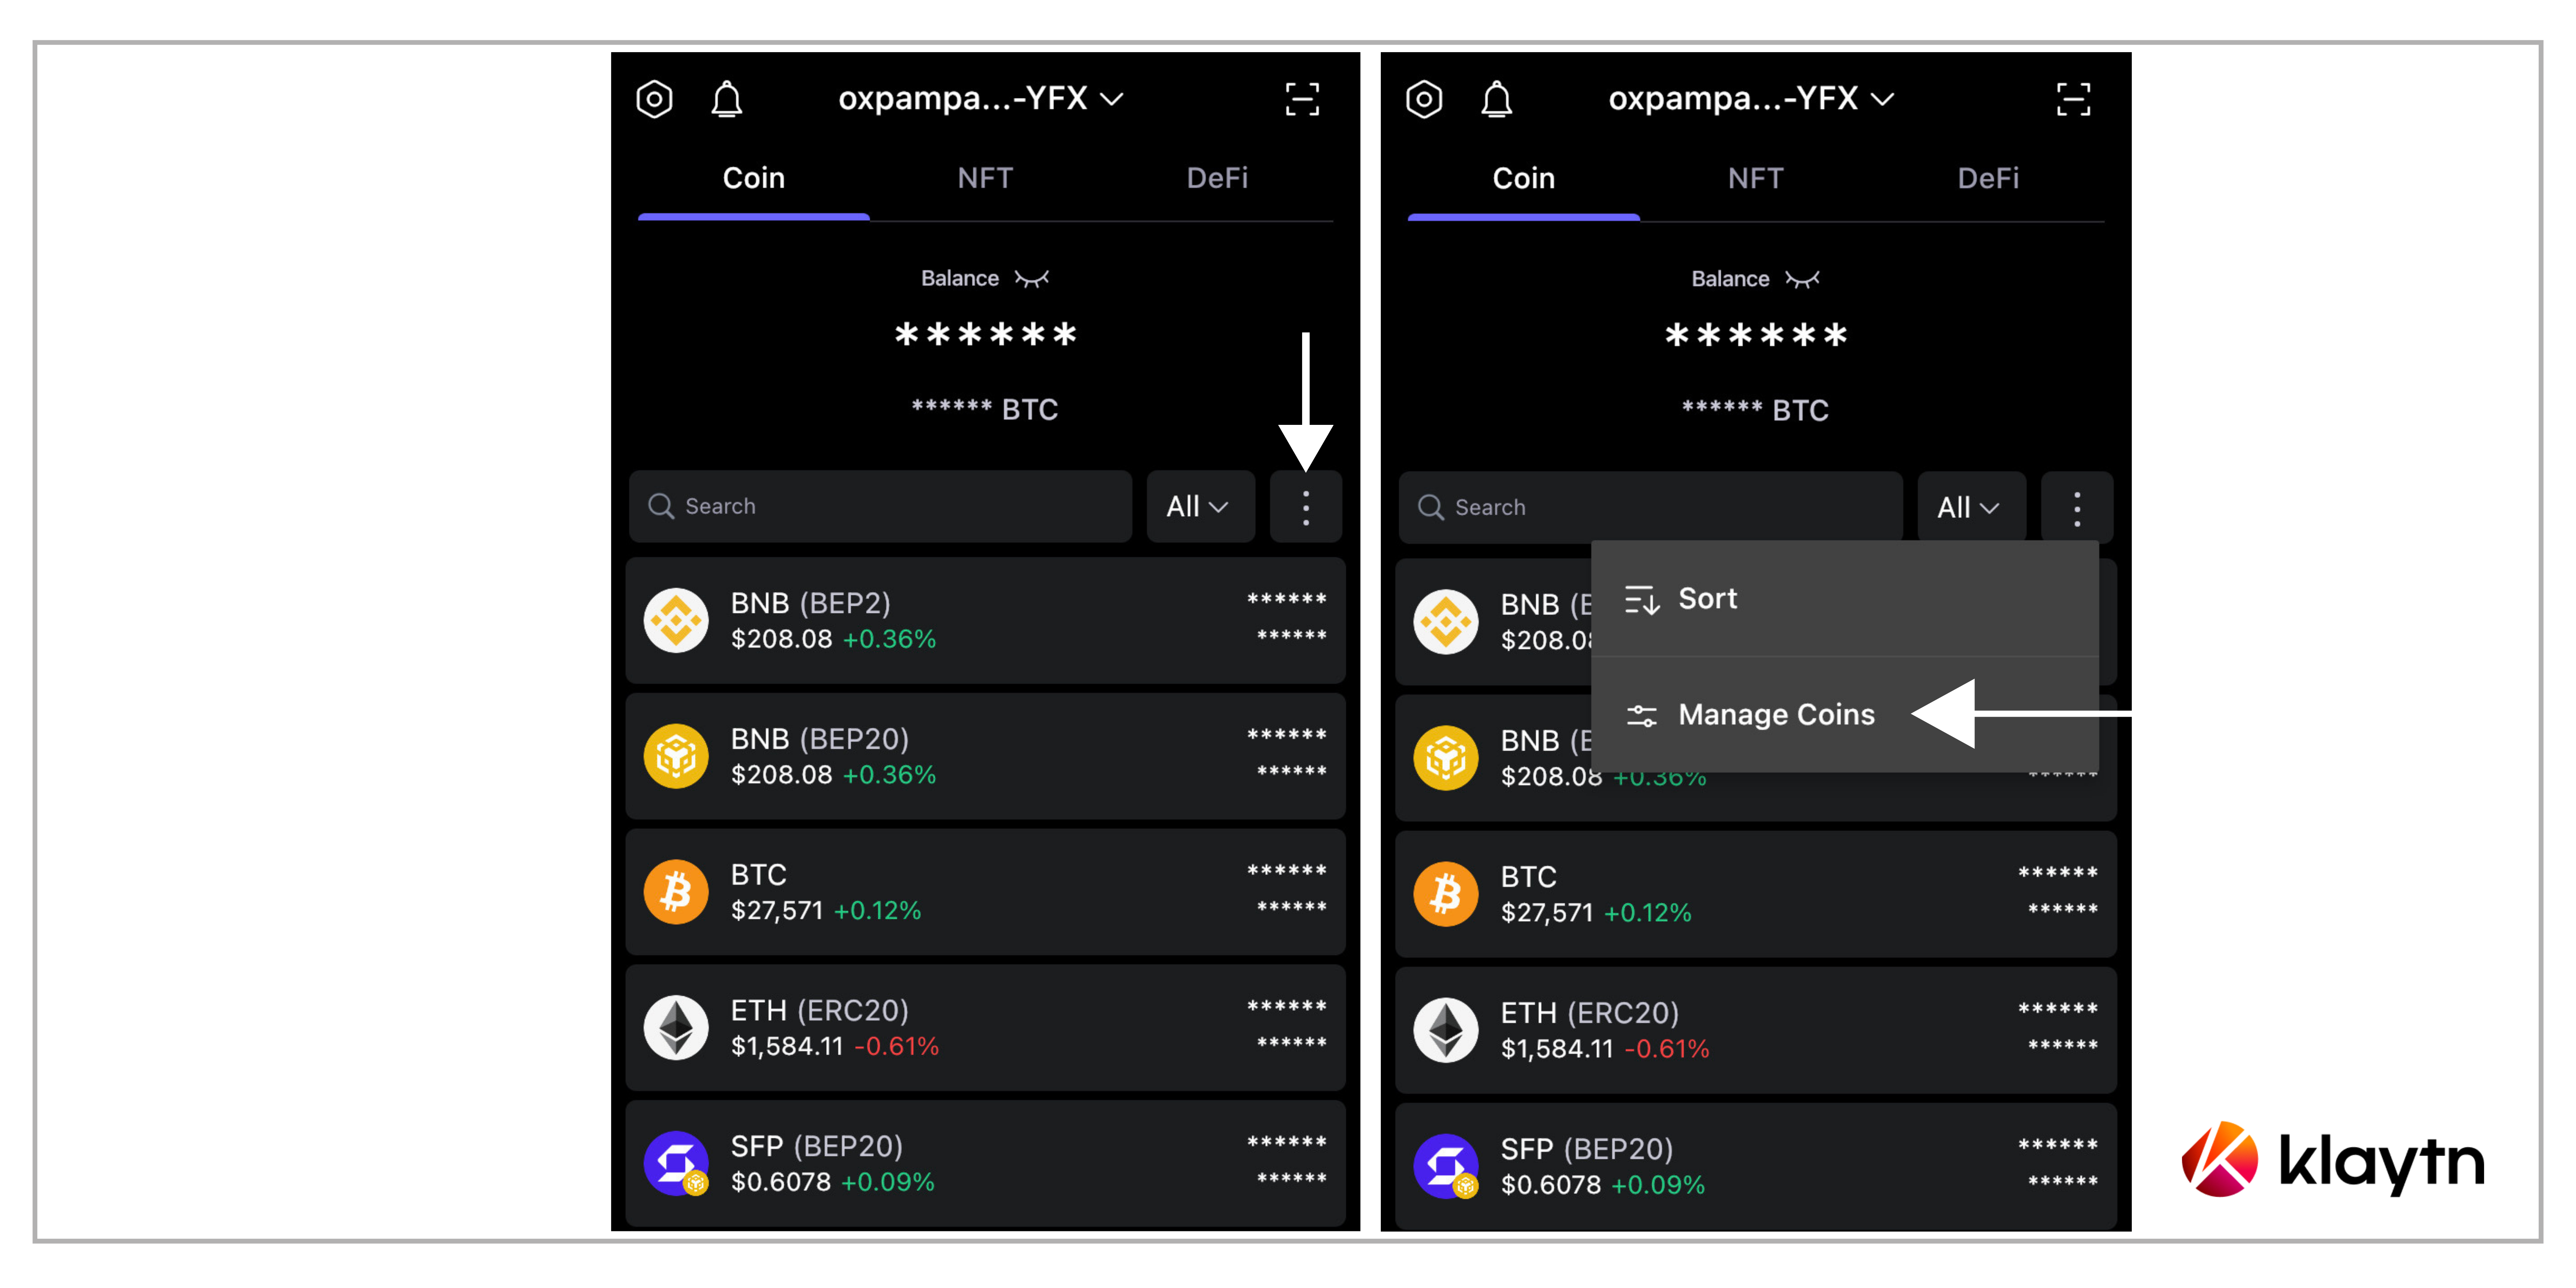
Step 1: Open the SafePal App and in your Wallet tab, click the ellipsis icon and then click the Manage Coins button as shown in the picture below:
Step 2: Select the coins you want to add (in our case KAIA), and click Add Coin at the bottom
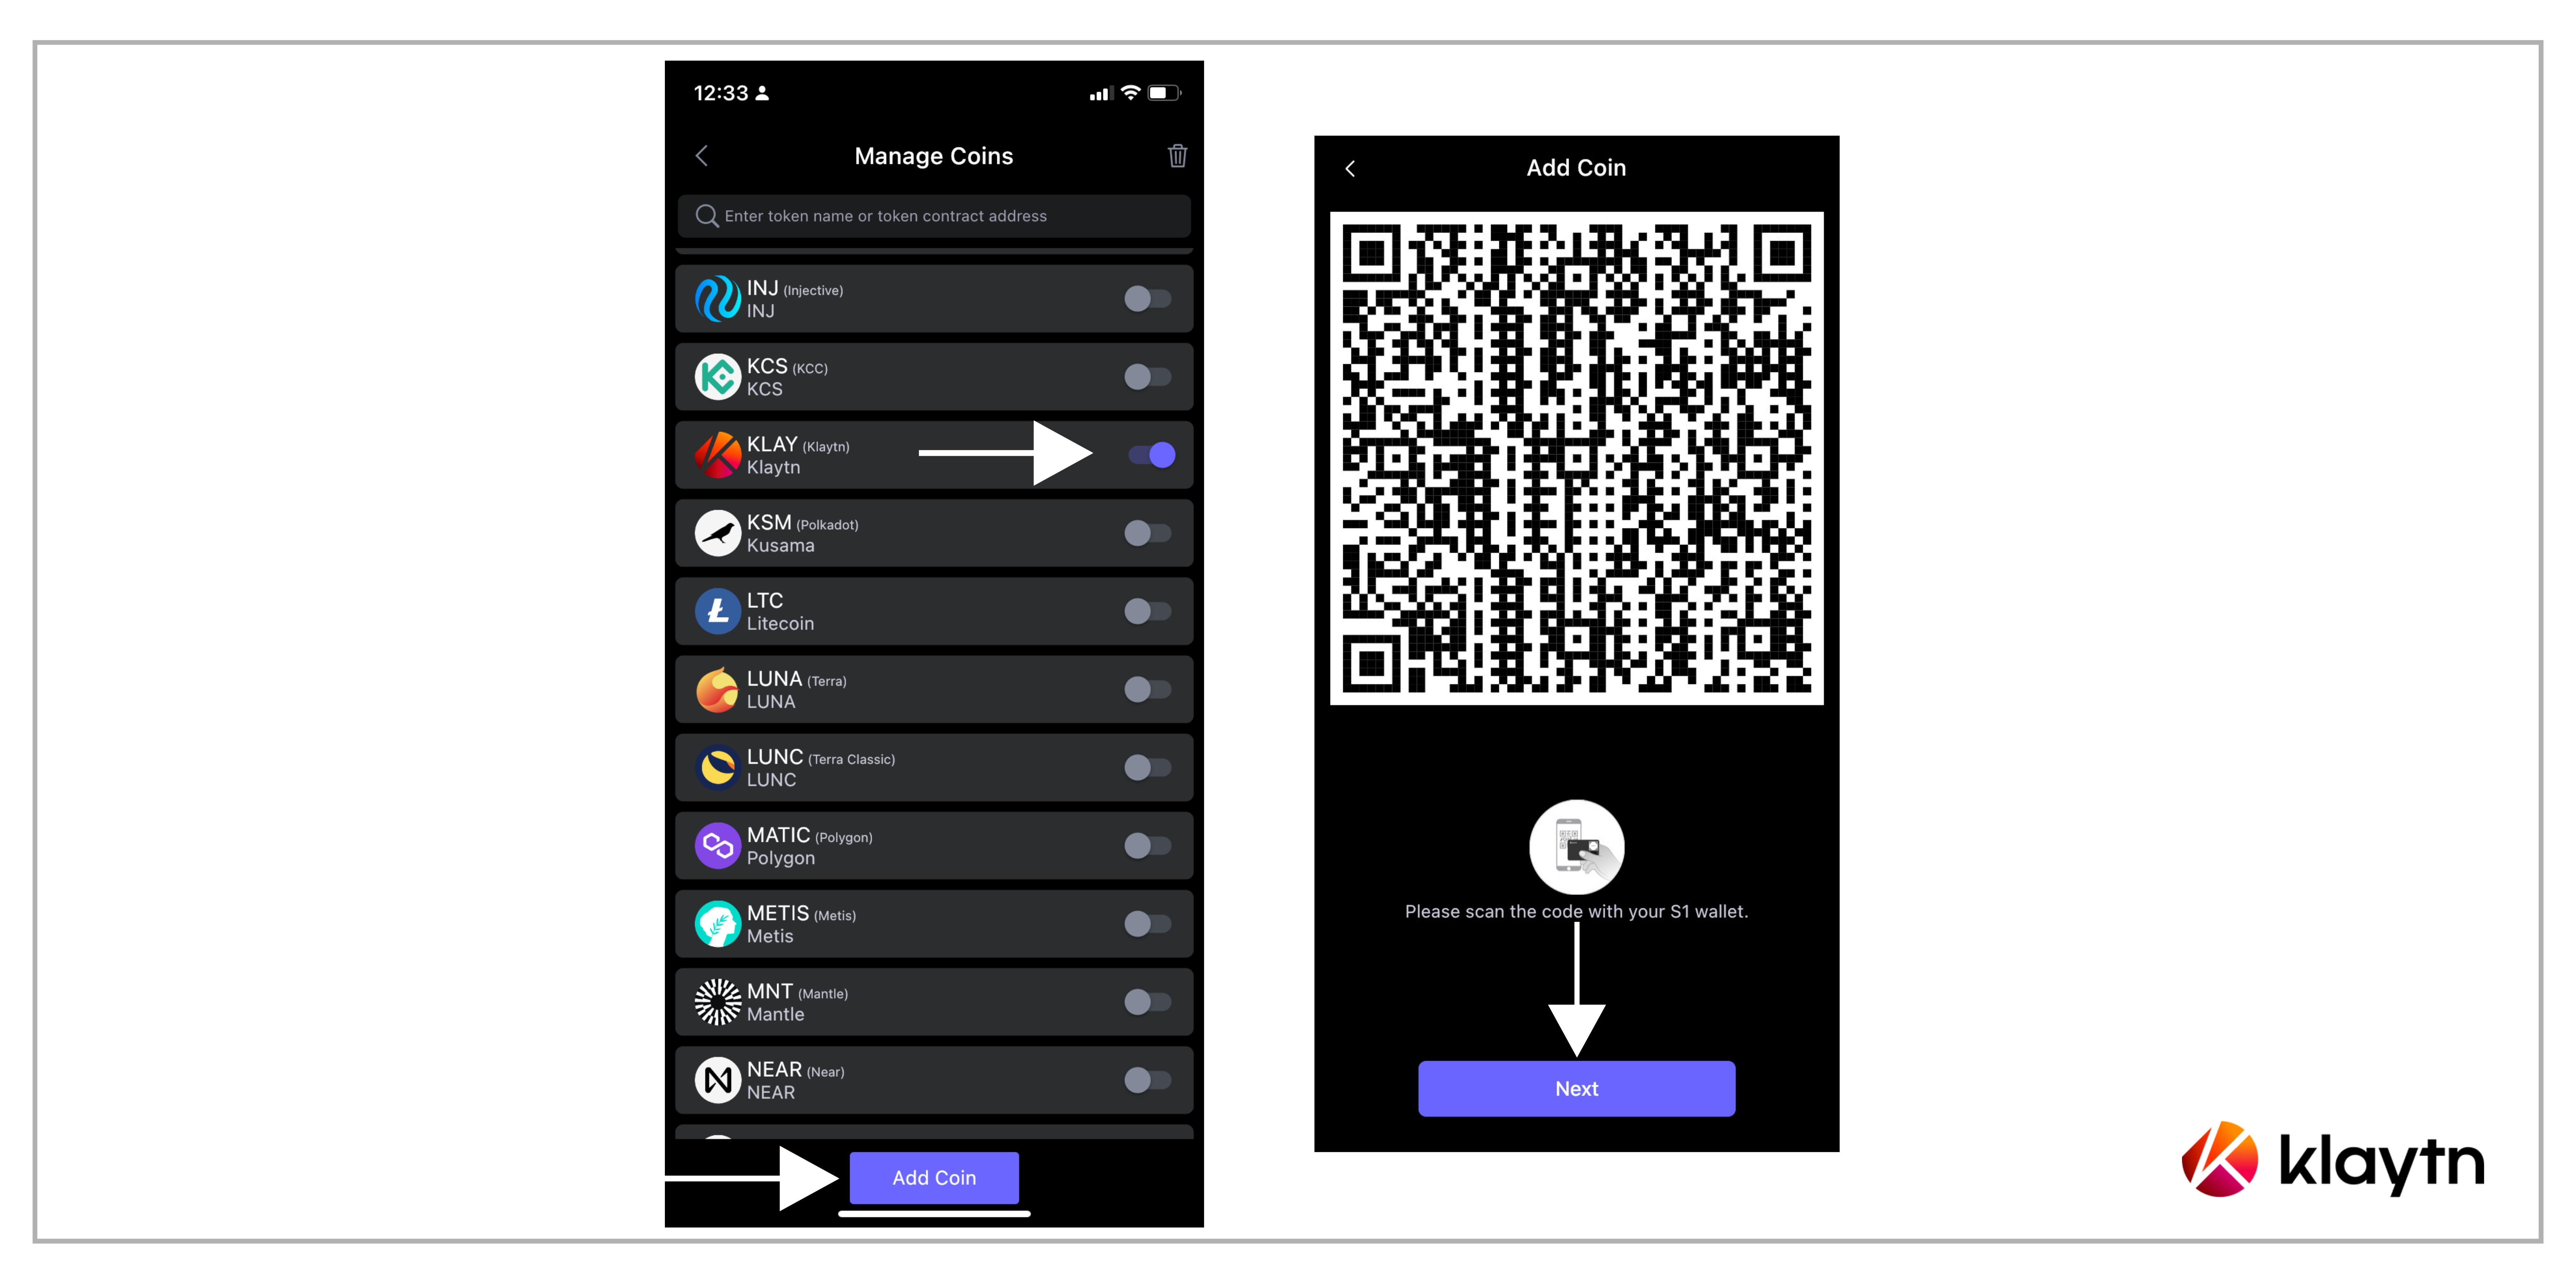
Step 3: Scan back and forth between the App and the S1 hardware wallet so that the data is correctly synchronized between the App and the device.
Step 4: After the coin has been added successfully, you can now view them in the Asset Management tab on the S1 device.
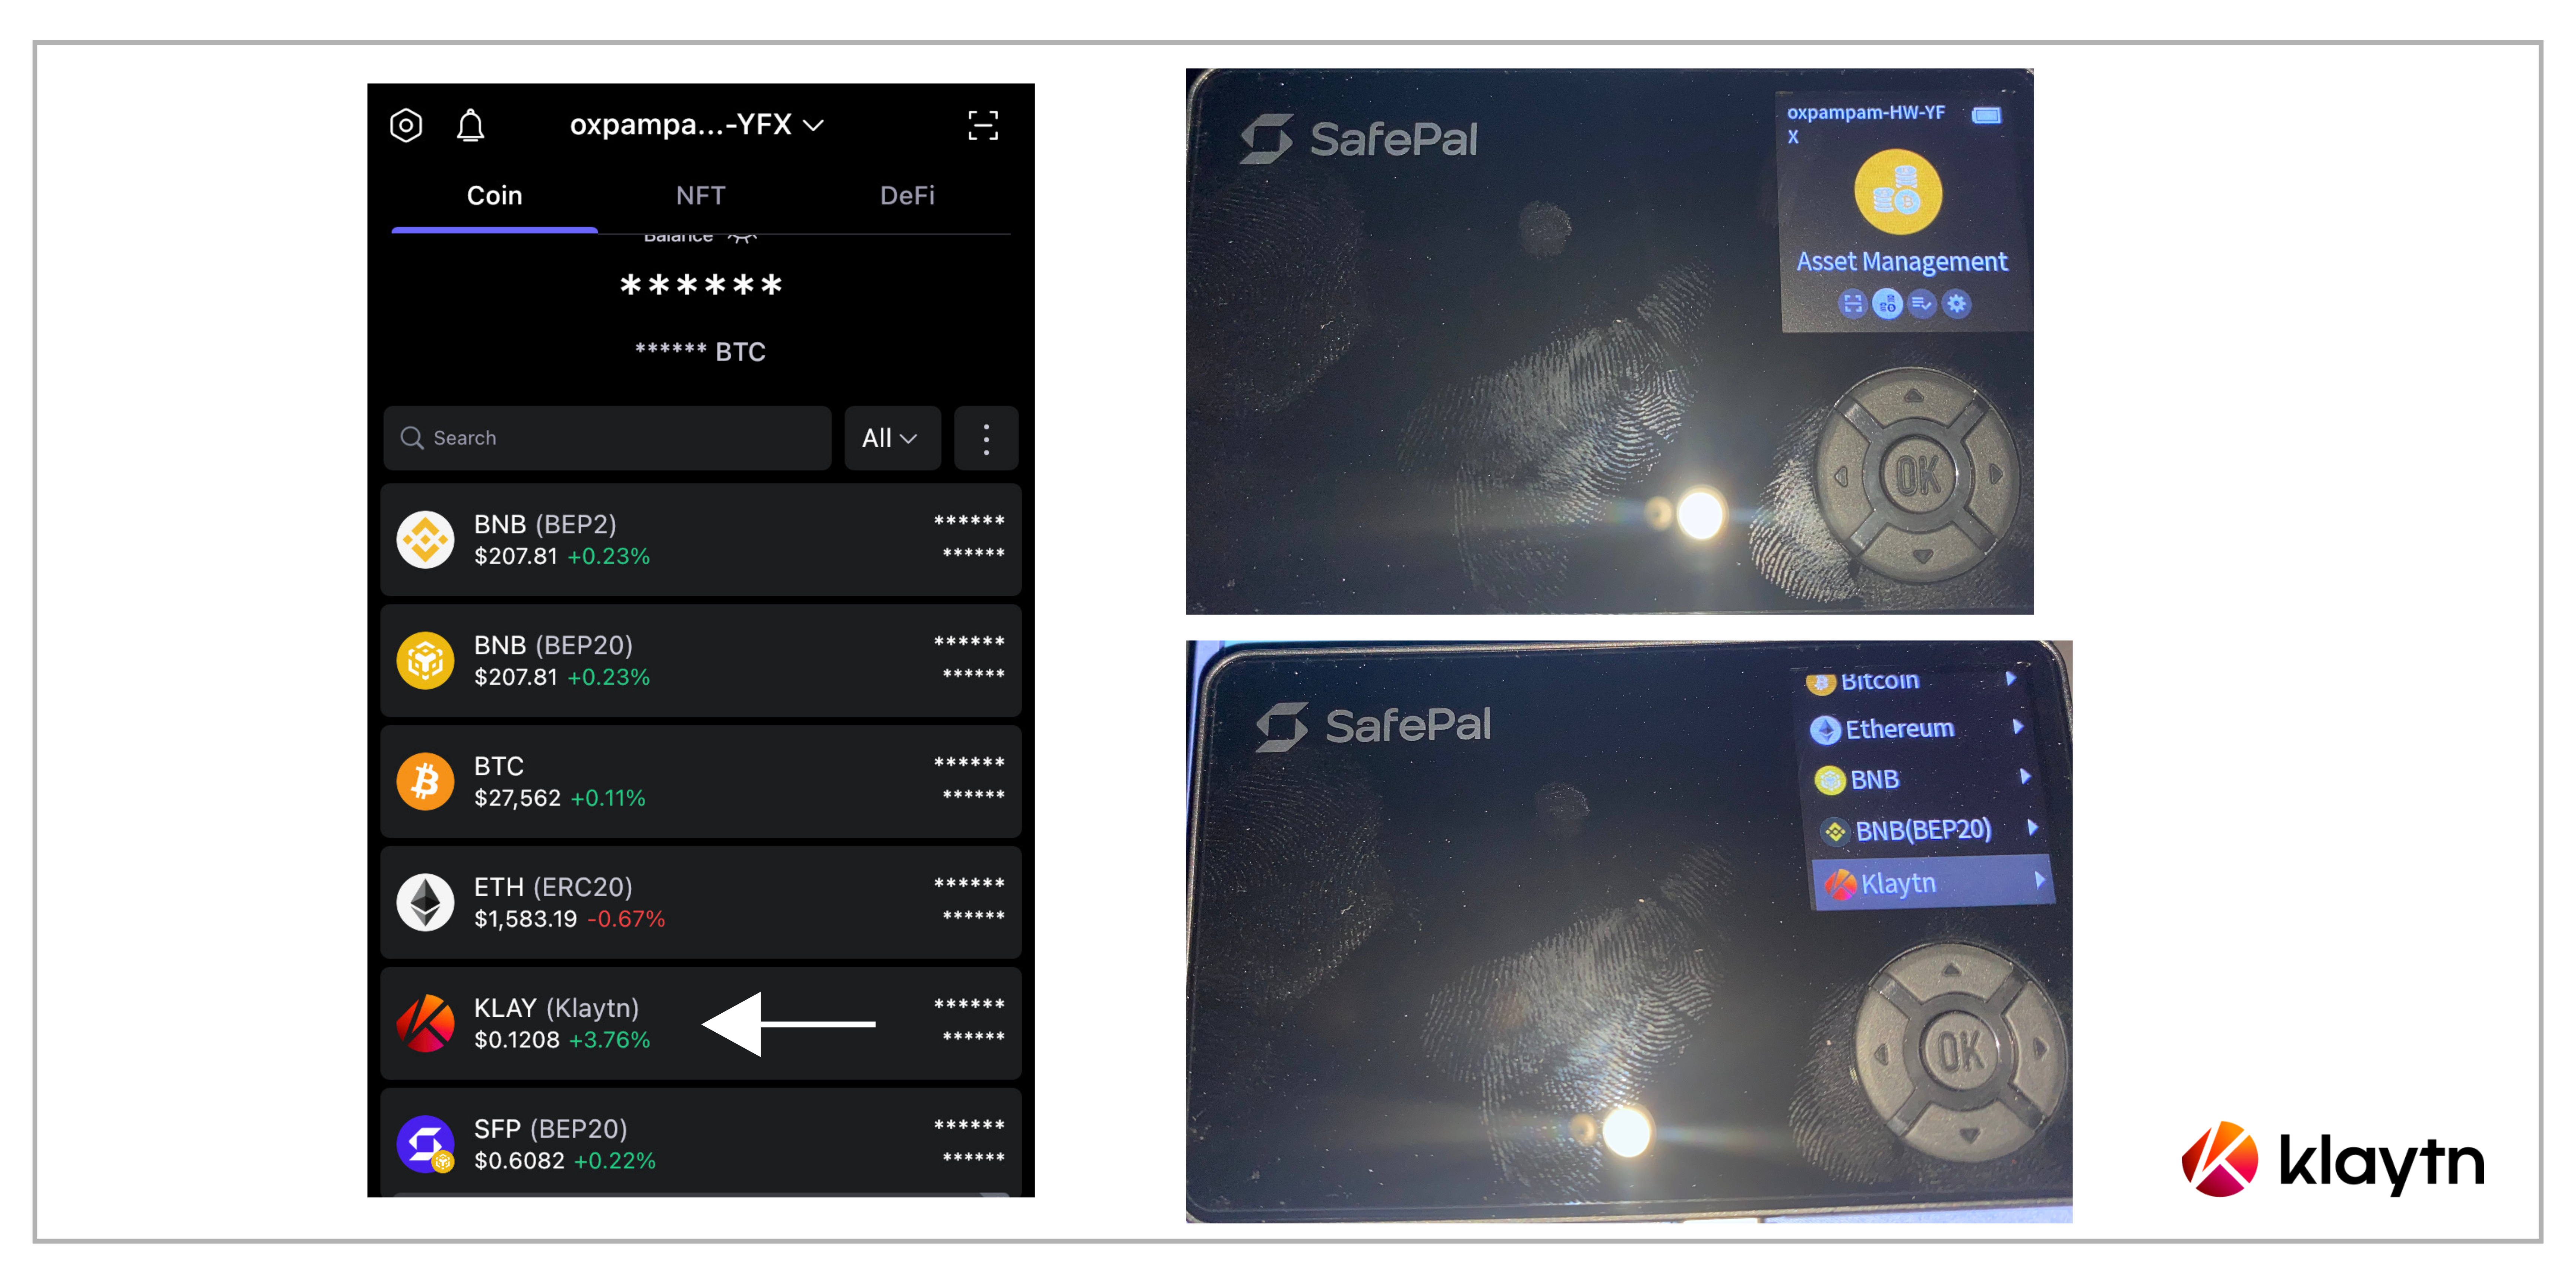
Kindly note that the steps above are applicable for adding any Kaia Compatible Tokens.
Receiving KAIA native coin
Once the coins (KAIA, KCTs) are successfully added, you can view them in the Asset Management tab on the S1 device. You can receive KAIA native coin using the following approach:
Using the SafePal App
- Select KAIA which gives you the option of swap, receive and send, click on receive
- You can either copy your KAIA address for the wallet, save the QR code, or have the other party scan the QR code from your phone.
Using the SafePal S1 Hardware Wallet
Step 1 Start your SafePal S1 device and navigate to the 'Asset Management'
Step 2 Select KAIA as the coin you would like to receive from others.
Step 3 Click on the ‘Receive’ button
Step 4 Enter the PIN code of your S1 device.
Step 5 Then you can see the QR code of your coin address, and show it to others so that they can scan and send the coin to you.
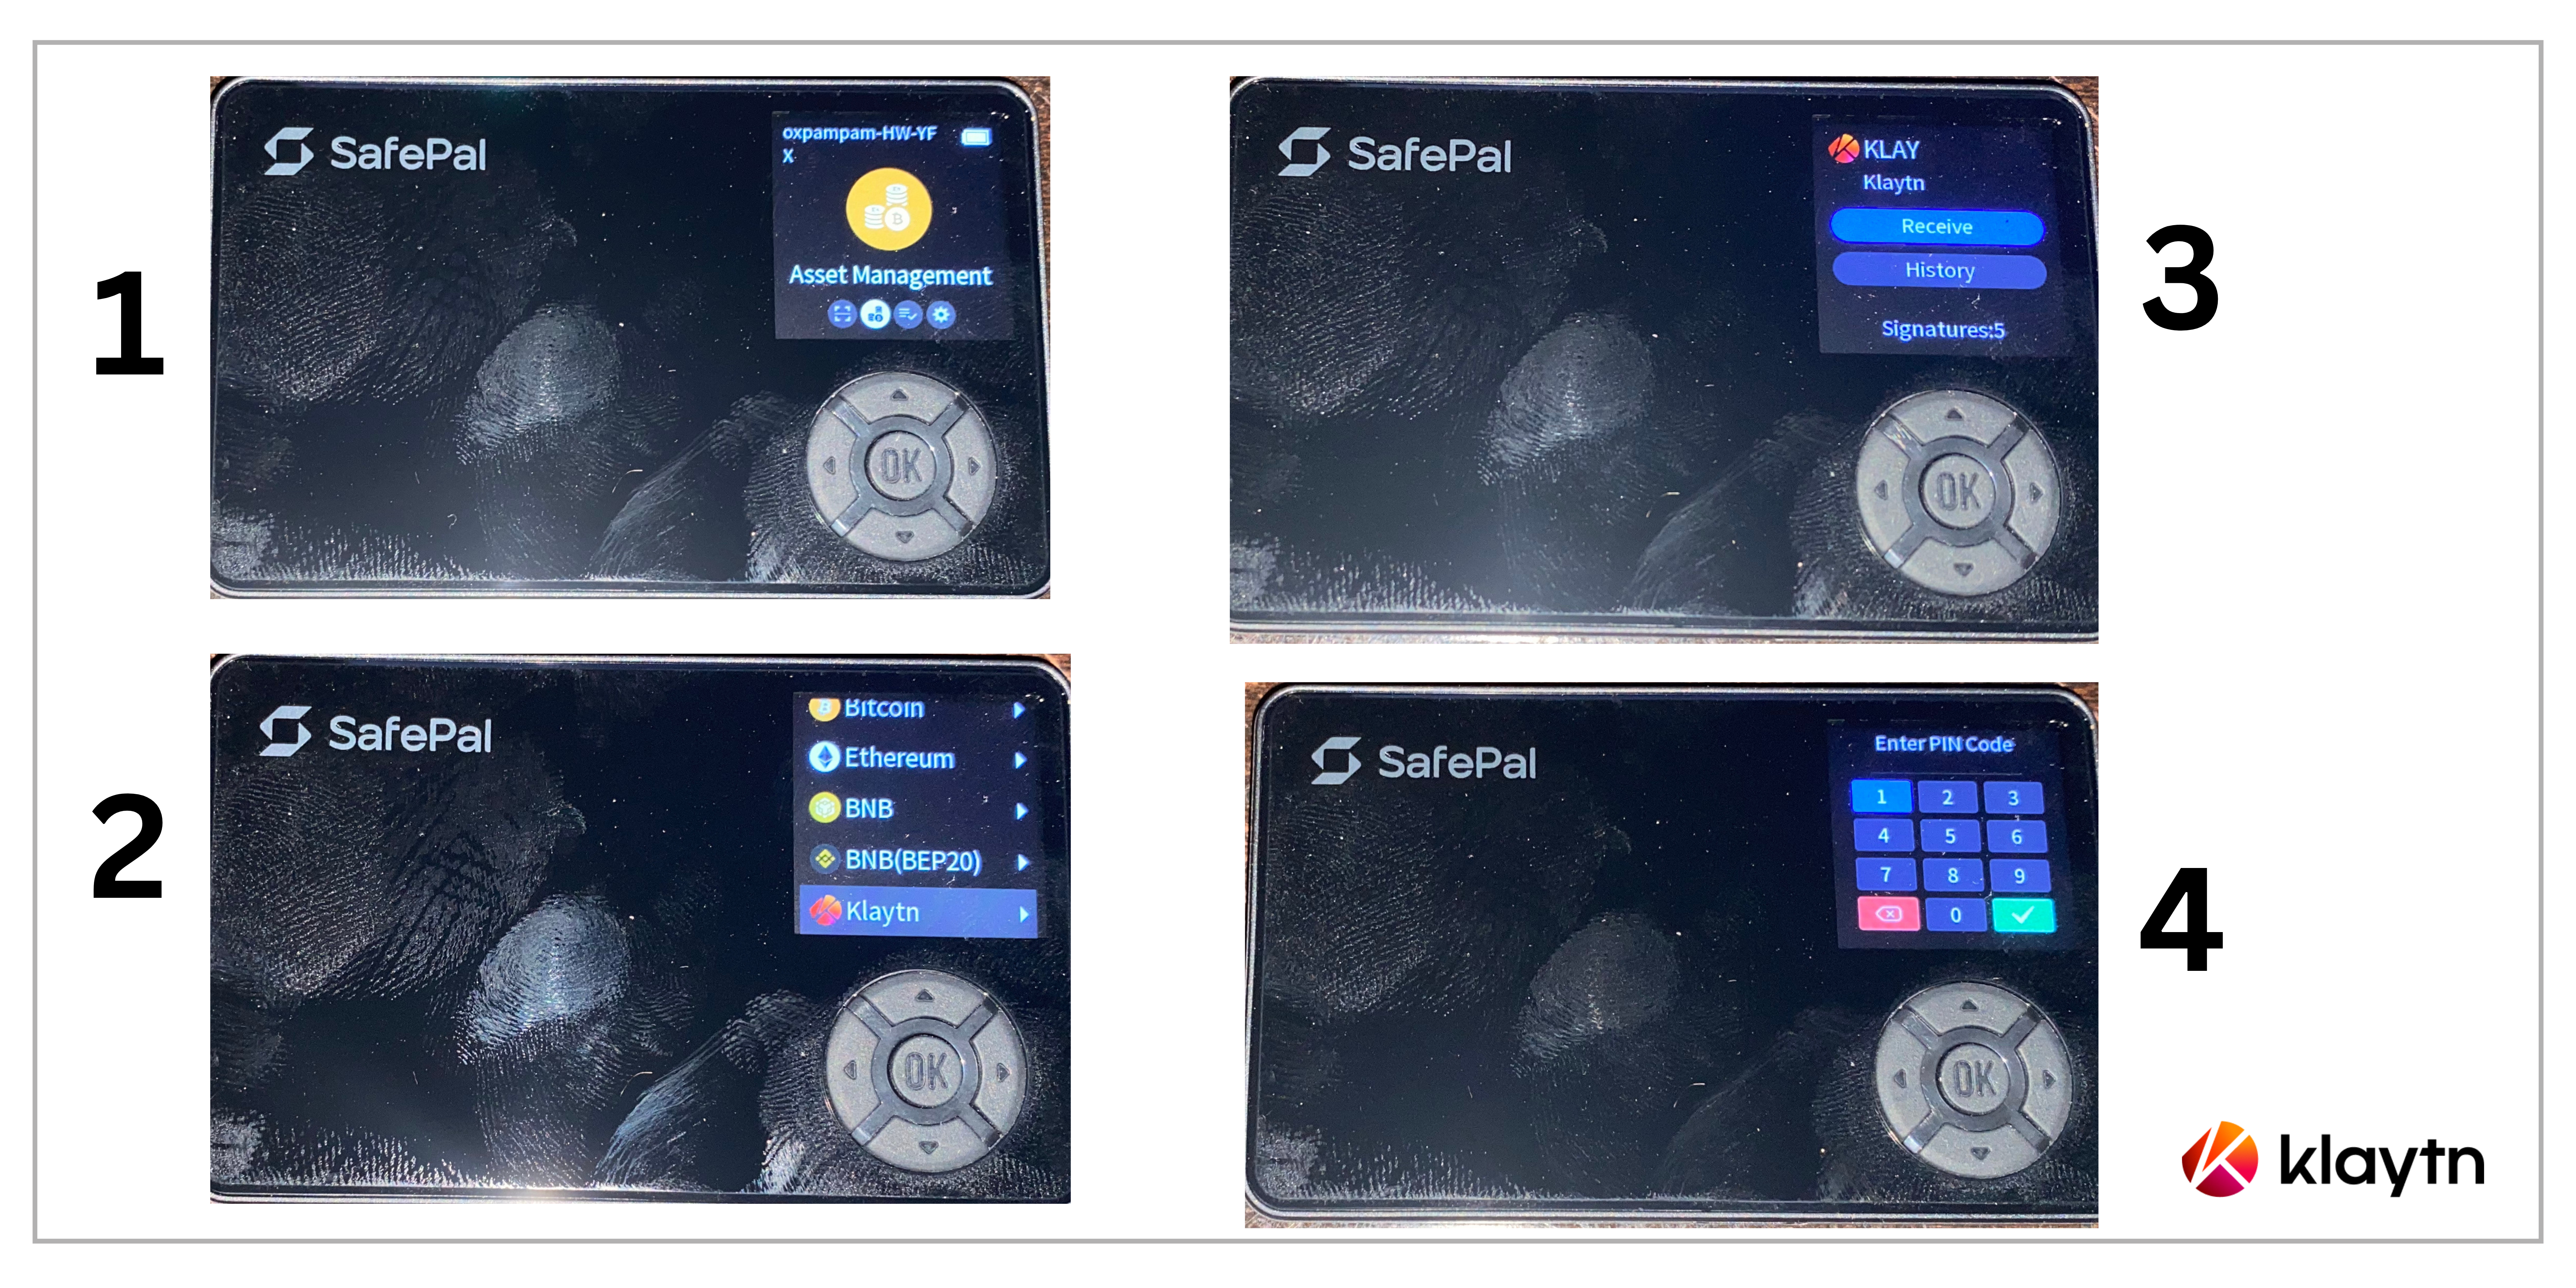
Kindly note that the steps above are applicable for receiving any Kaia Compatible Tokens.
Sending KAIA native coin
To send KAIA native coin from your hardware wallet, kindly follow the steps below:
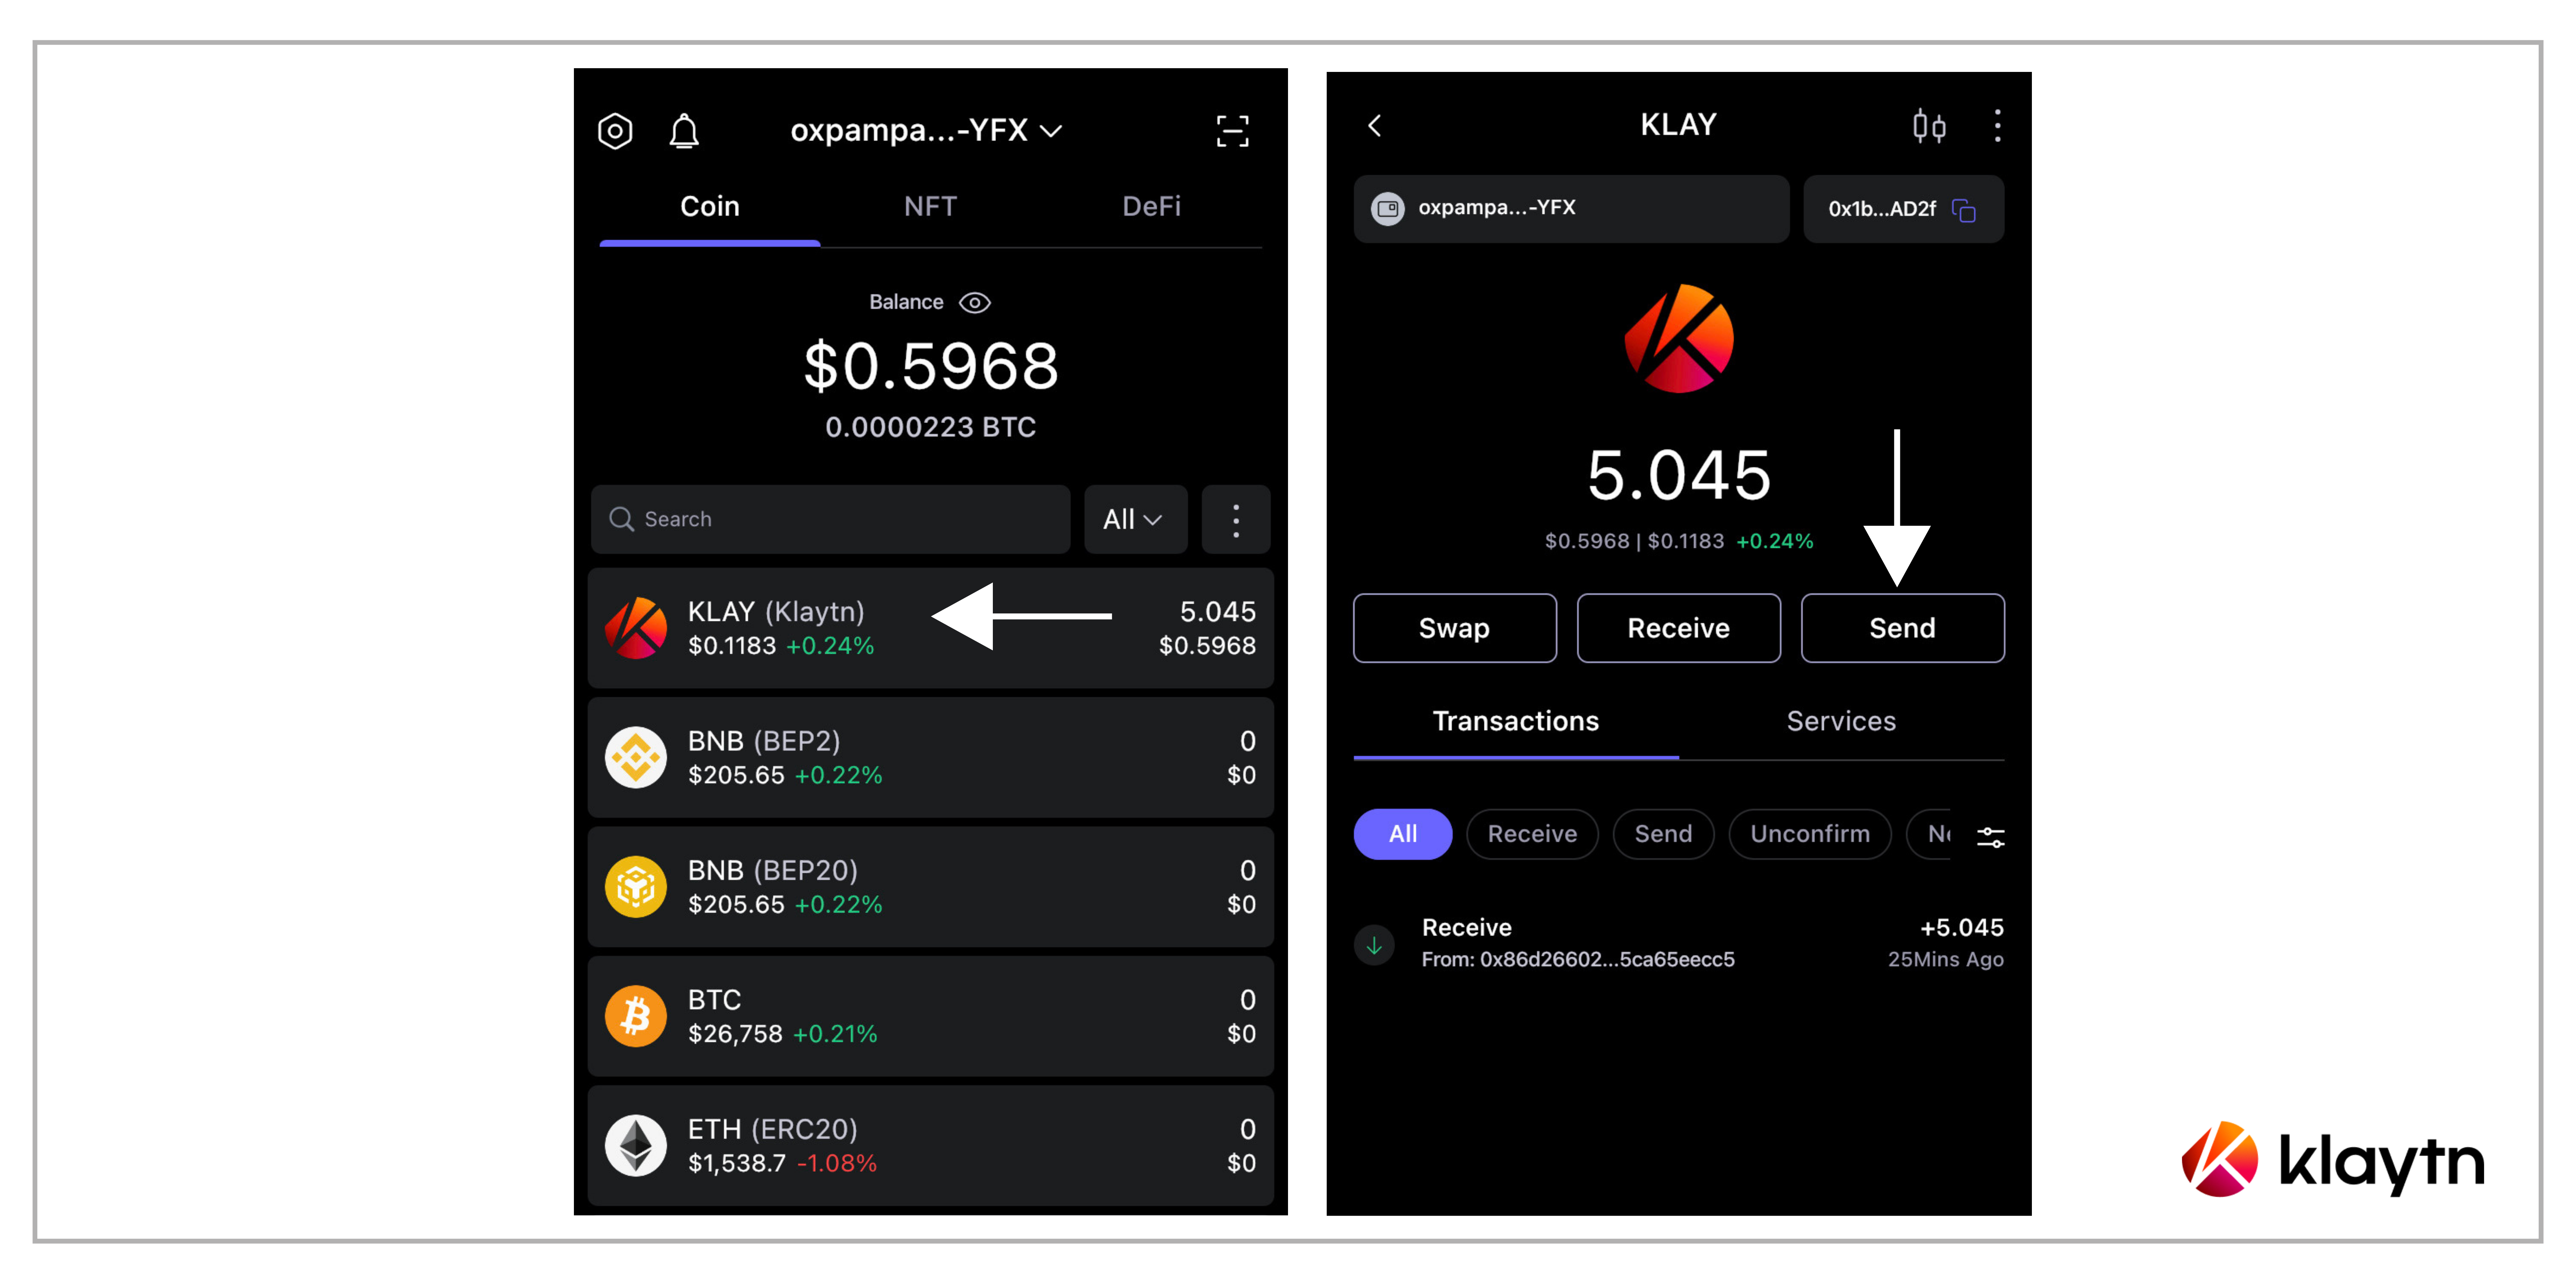
Step 1 On the SafePal App, choose the coin you want to send(in our case KAIA)and click Send.
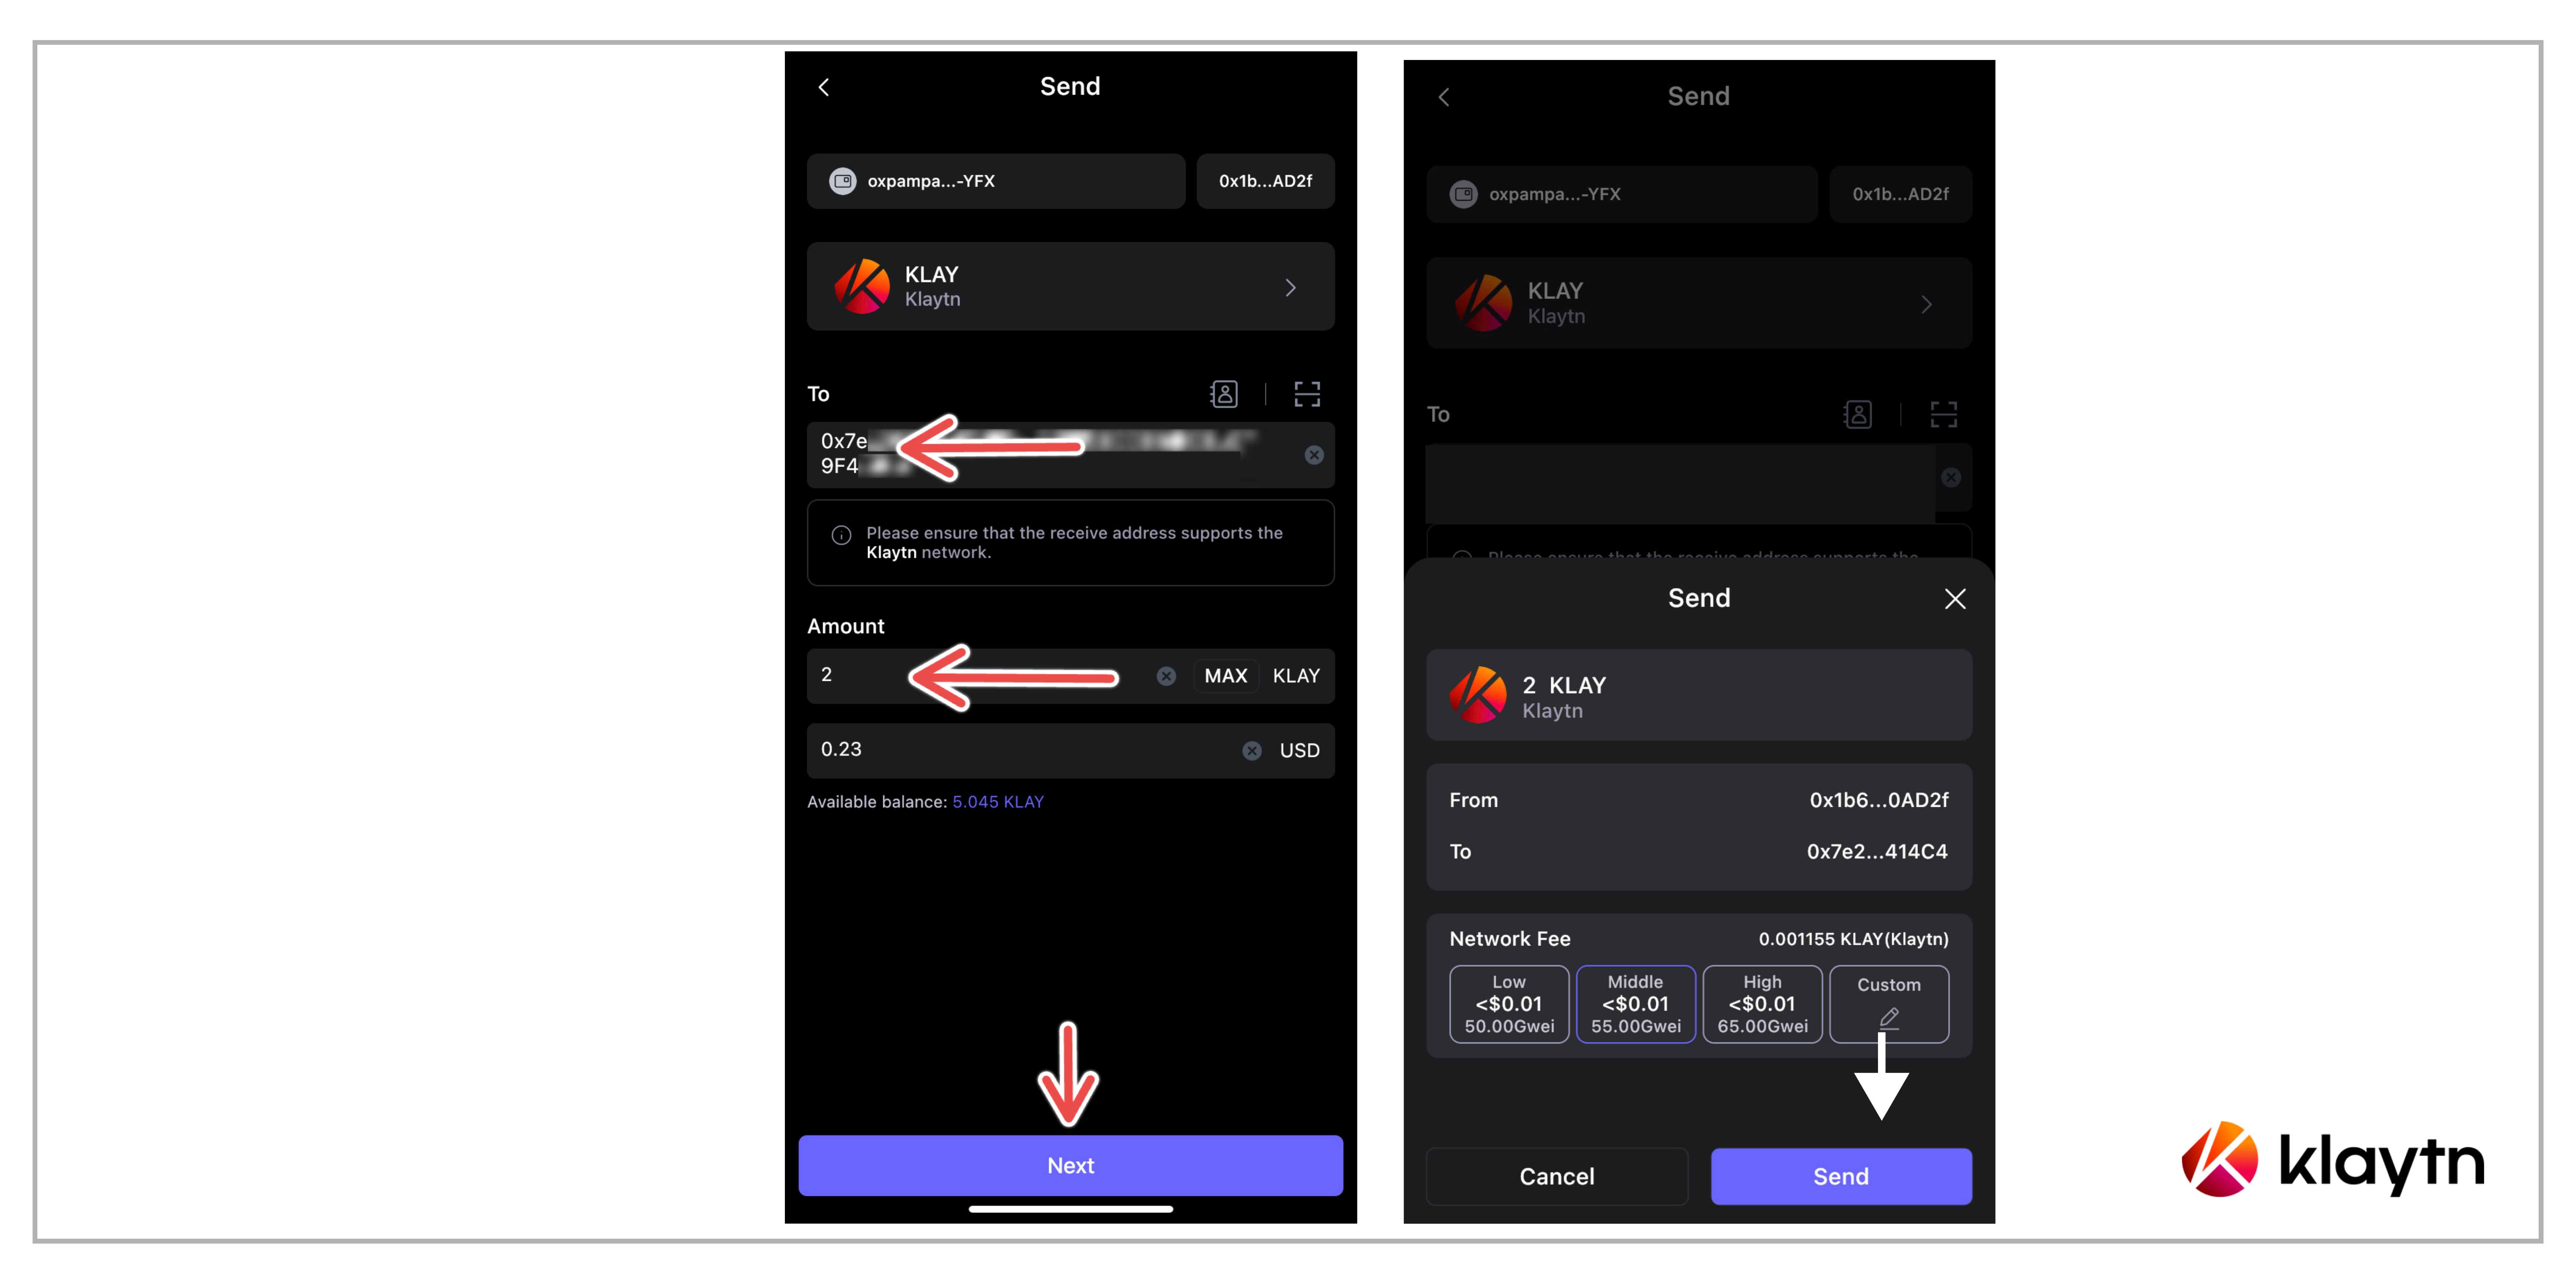
Step 2 Enter the destination address, amount, and click 'Next' to confirm the details again. Ensure to verify your transfer details in this step.
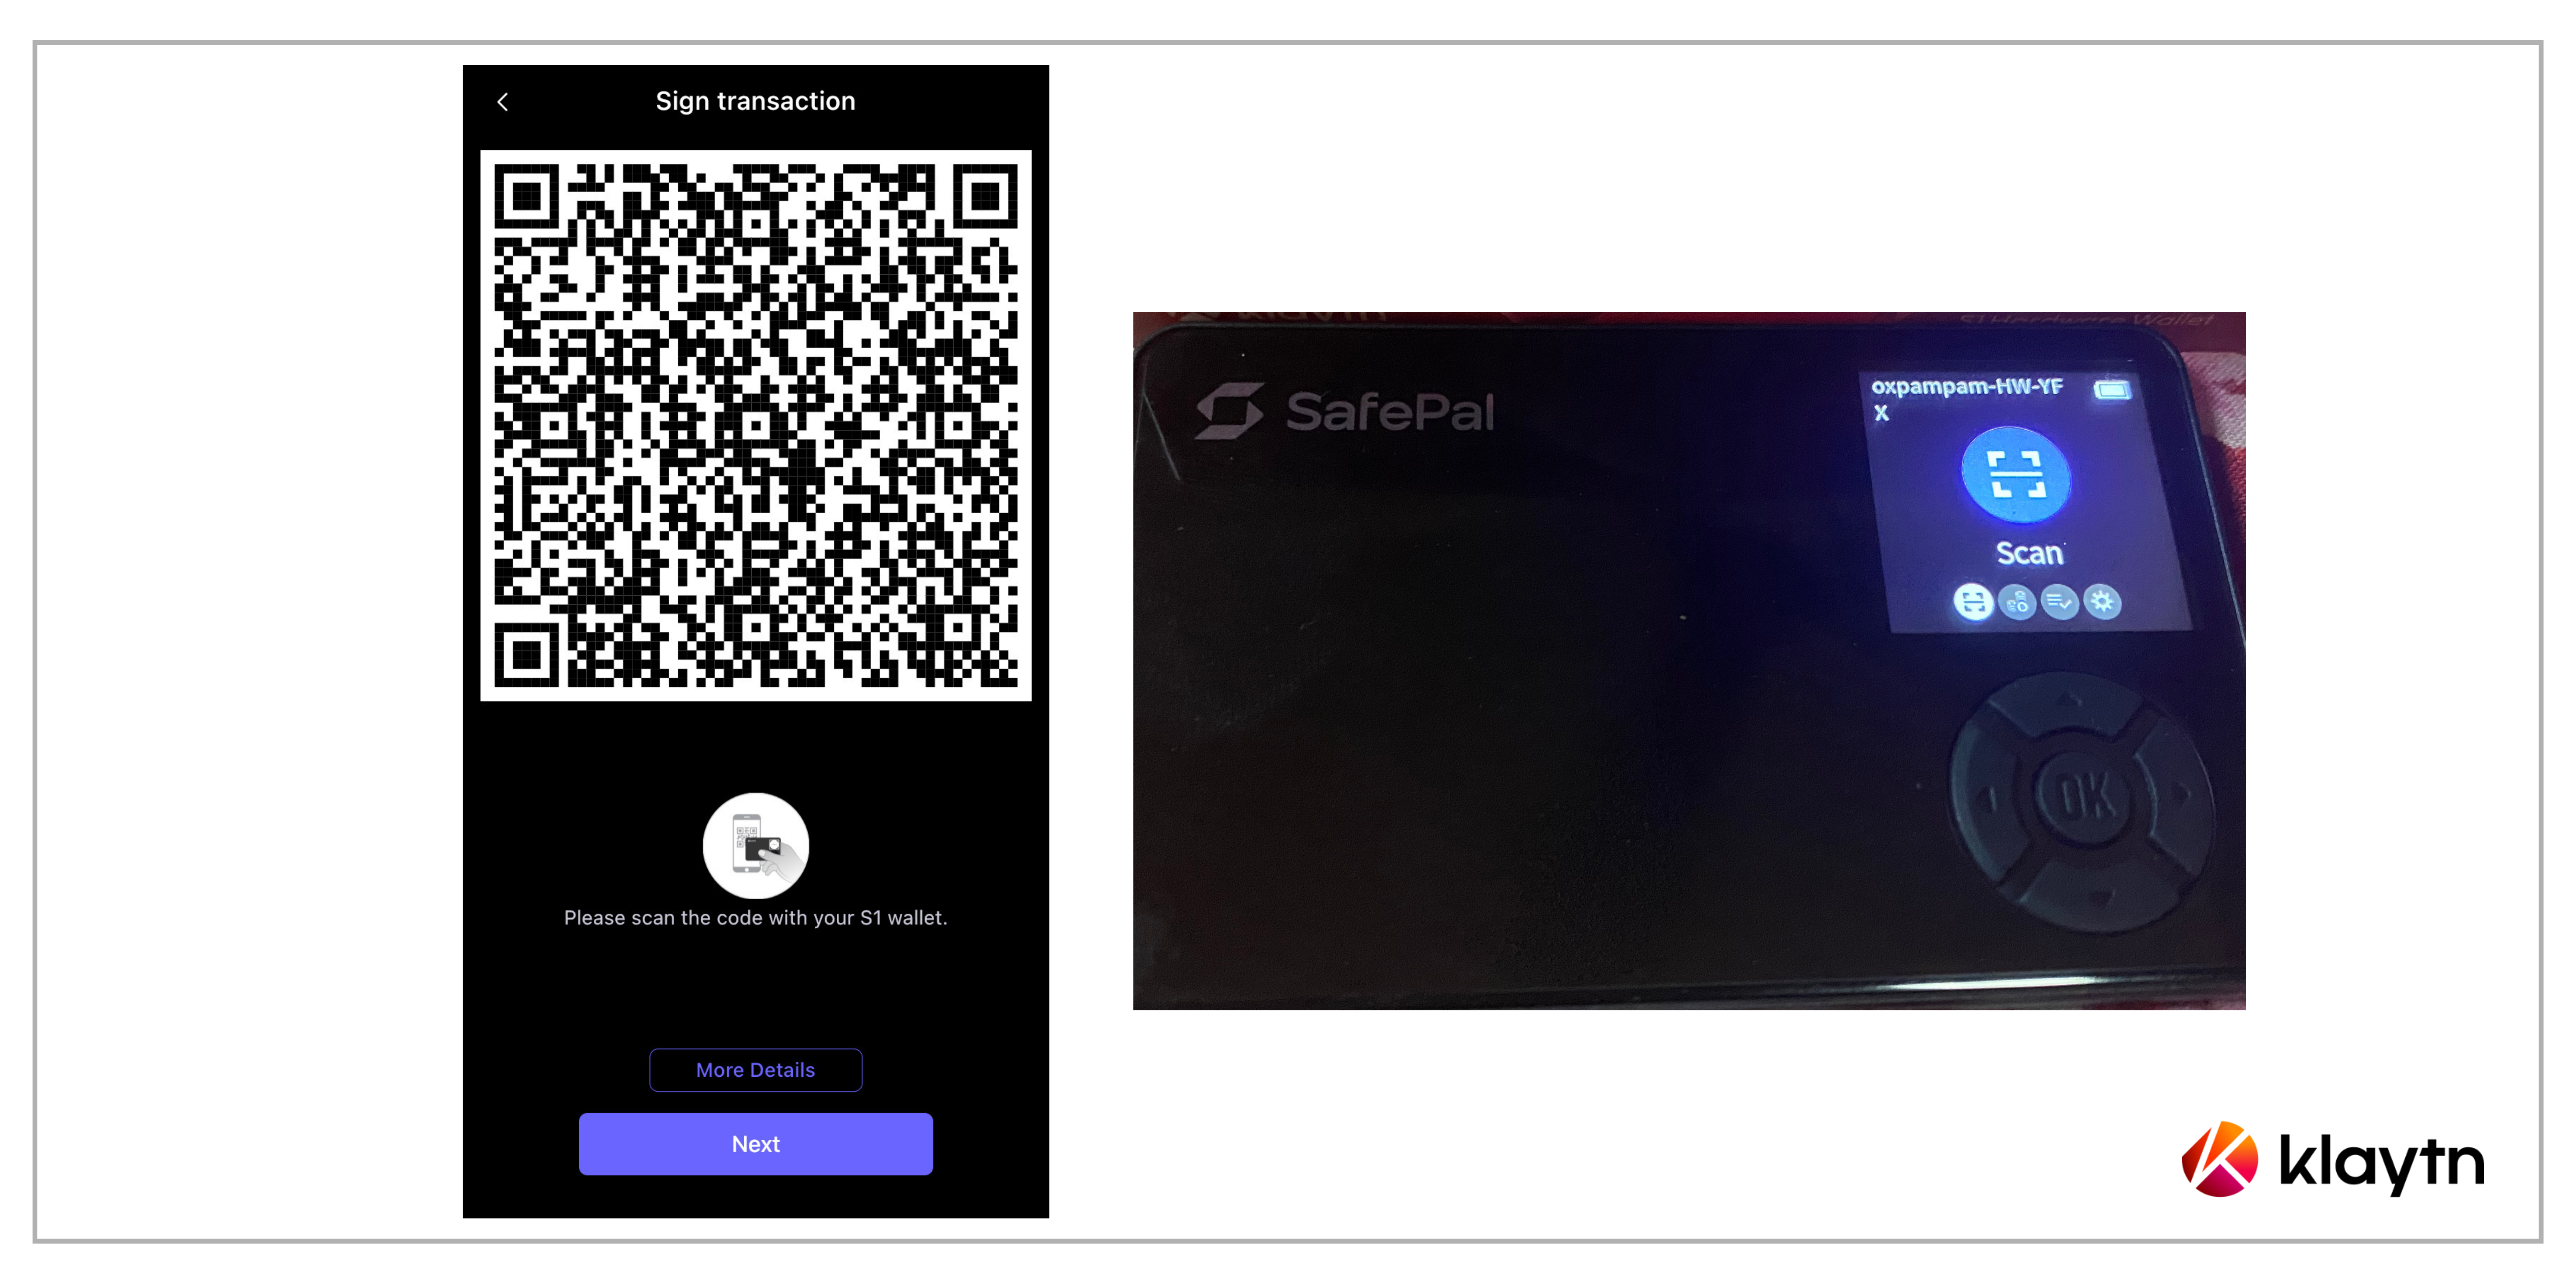
Step 3 Initiate the signing process of the S1 device.
In this step, a QR code (as shown below) containing the transfer details will be displayed on the SafePal App. Start your S1 hardware wallet, and enter the Scan tab. Next is to scan the QR code on the SafePal App. Doing this ensures that the S1 device receives the transfer details in an offline environment.
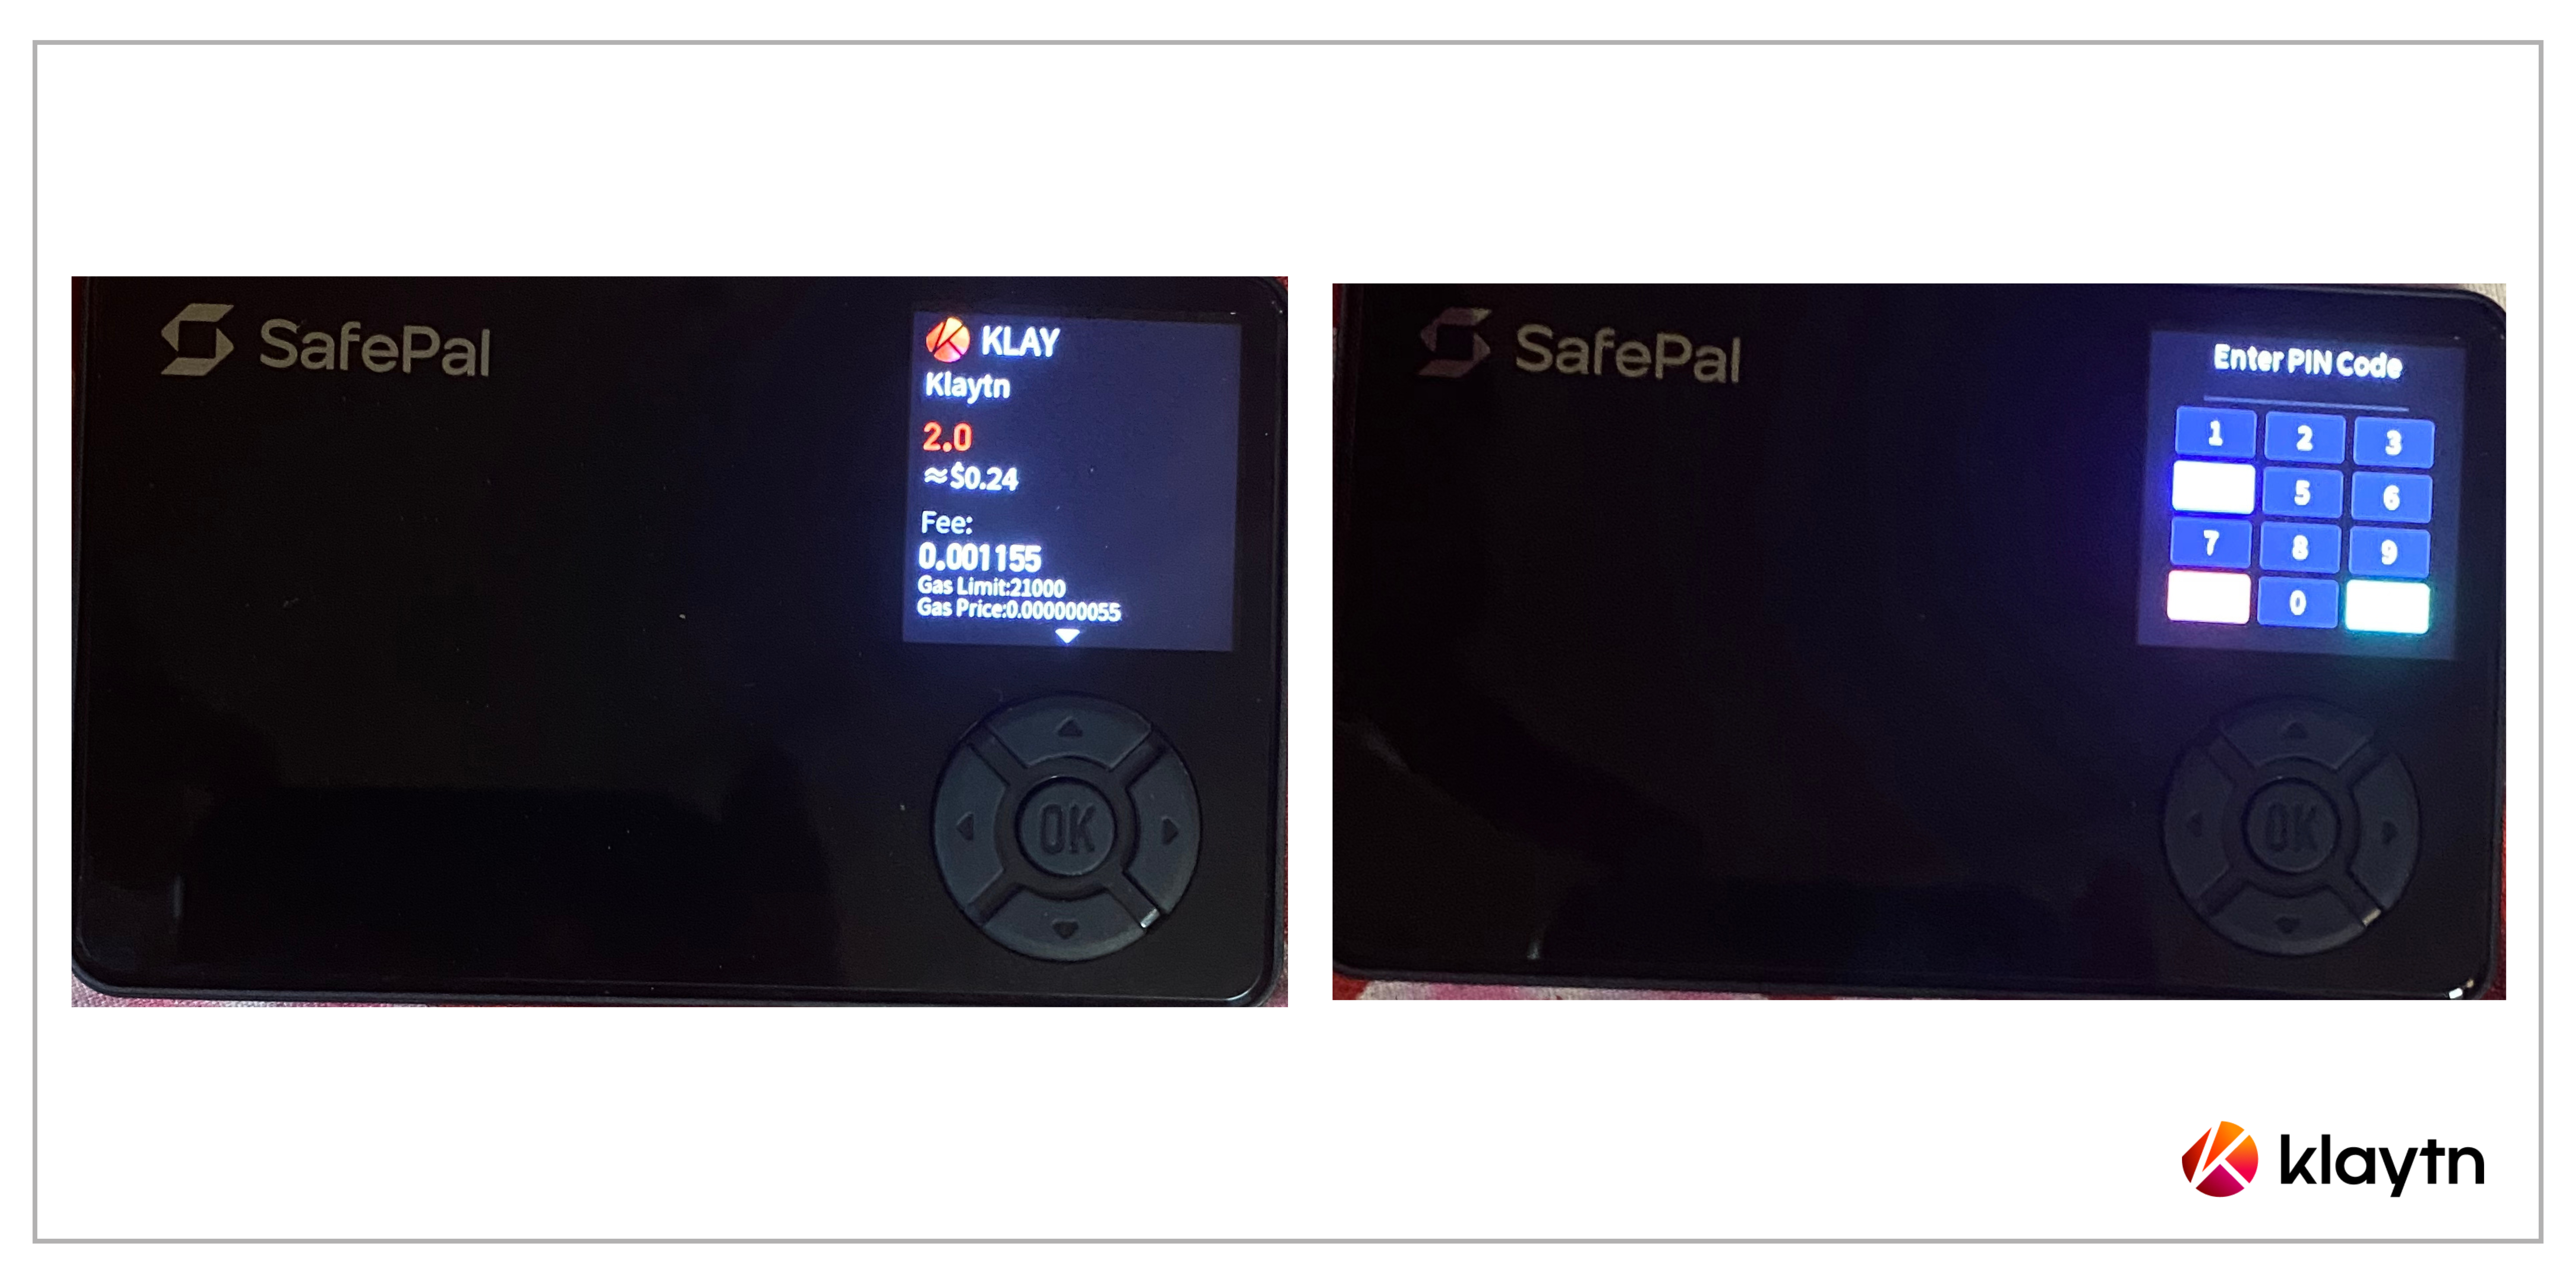
Step 4 Sign the transfer on S1 Device
After successfully scanning the transfer details, you will then see the transfer details(amount, fee, gas limit, etc) on your S1 device. Next is to verify the details and enter the PIN code.
Step 5 Synchronize the signature back to the SafePal App
After successfully signing the transfer on the S1 device, you will see a set of dynamic QR codes shown on the S1 device. On the SafePal App, click 'Next' to open the cellphone camera. Use the SafePal App to scan the dynamic QR codes shown on the S1 device.
Doing this ensures the App receives the signature contained in the QR codes and is ready to broadcast the transfer to the blockchain (Kaia).
Step 6 Click Broadcast on the App and wait for the transfer to go through
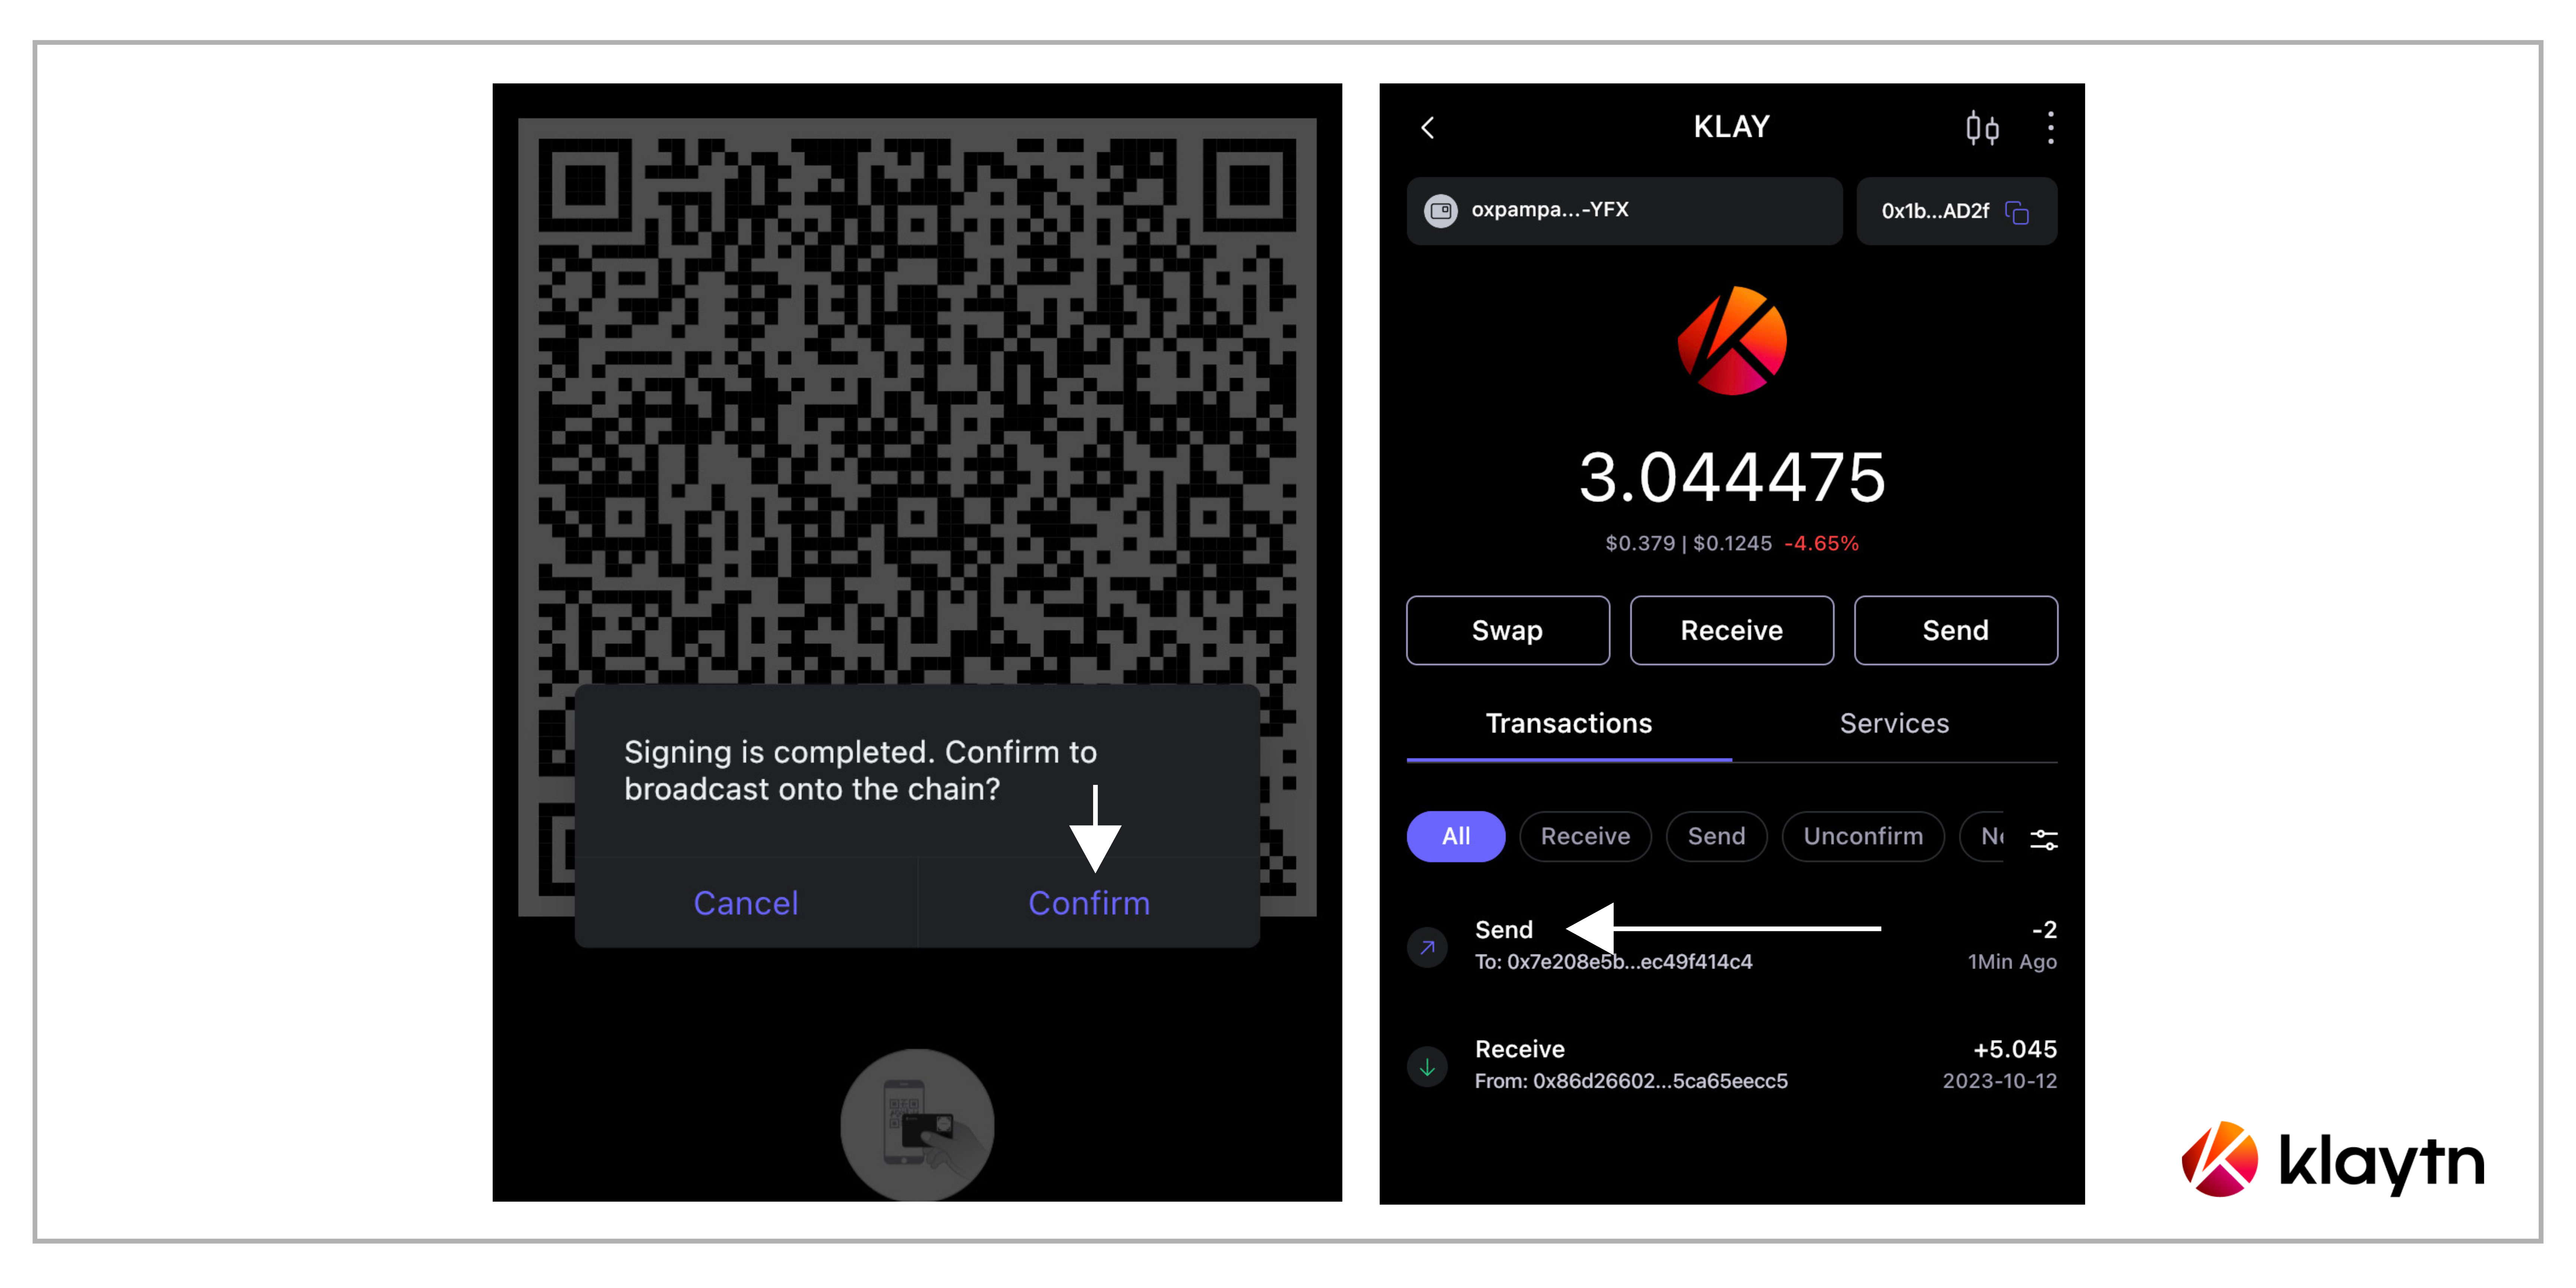
Kindly note that the steps above are applicable for sending any Kaia Compatible Tokens.